
Amp Rack Build

With the width of the two speaker, I has BARELY enough room for the amp.  At nearly 2 feet wide, that left about 1/2 inch clearance on each side.  I also had to find room for a second amp and the two MB Quart passive crossovers.  The Stinger capacitor was an after thought that I figured I would fit in where I could.

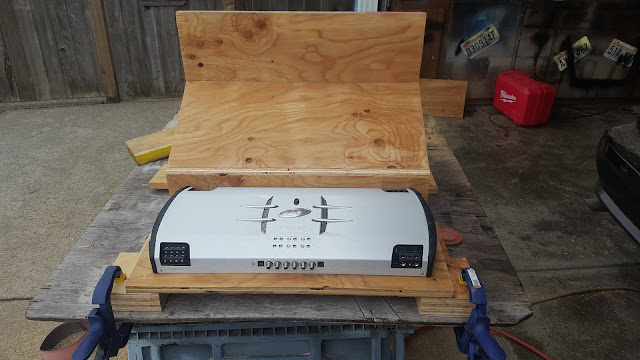
Starting from scratch, I start cutting panels.  Eventually I came up with a 2 tier design where the crossovers would mount to a vertical section in the back.
 

Everything was glued and screwed together.  The holes for the wiring were drilled and then the whole assembly was covered with matching carpet.


Finally the amps and crossovers could get mounted to the rack for the very last time.

To make it easier to install and somewhat modular, I wired the amps using the amp rack in a manner to make installation easier.  All wires were routed and connected via distribution blocks.  To keep the wires in place, hold downs were used.


One final test fit was done before everything was secured with straps and brackets.

Comments

Popular posts from this blog

Overhead Console Install

One of the "asks" was to install and wire in an overhead console.  I believe it was from an Astro Van and nothing about it fit the Impala.  I was quite surprised how long the install took but the finished product is really all that matters in the end. I first disassembled the console so I could paint it as well as figure out how to best install the darn thing. With the headliner out, I can form the base to conform to the Impala headliner.  I decided to use thin aluminum sheets and rivet them to the sides to fill the gaps. I then covered the base with material that matched the headliner. Painting everything the same matte black color as the rest of the car so it matches. Lastly the final assembly.  I as really happy with how it turned out thus far. I really hate cutting up a perfectly good headliner but this mod requires it.  Most people cut huge holes and also drill into the cross brace and use screws/hardware that can damage the roof if not careful.  I

Center Console

The center console needed to get modified so it would work with the new B&M shifter.  If we had a '96 console, things would have been much easier.  Unfortunately they are very expensive so the '95 console was used.  The two cup holders were situated exactly where the shifter needed to be so out comes the power tools. After the console area was cut, I purchased a piece of ABS plastic and formed it using a heat gun to match the contours.  It then got cut to make room for the modified shifter bezel. The panel was then glued to the console using ABS adhesive.  Because the colors didn't quite match, the console was washed and prepared for some SEM plastic paint. I am really happy with the end result.  Not sure if I'd want to do it again because as simple as it seems, I had 12+ hours into the console.

Speaker Box Build

When we initially went over the terms of the project, I stated that I did not want to do a full custom stereo installation.  As time progressed, I had spent so much time working on it, I didn't want to do a half-ass job finishing the trunk.  We went back and forth on ideas but in the end, I decided to just finish the car so Dan could enjoy it rather than get it back and continue to work on it. The first task was to build the speaker boxes that would house two Infinity Perfect 12 inch subs.  He wanted a good punch but not a booming sound.  After looking over the specs, that meant a sealed box of 1 cubic foot for each sub.  The trunk floor is not flat in a B-body so templates had to be built to accommodate the odd shape.  I decided to built 2 separate boxes - one for each side of the trunk. Here is the outline of the speaker box faces.  I had just barely enough room to mount a 12 inch subwoofer into the panel.  My goal was to be able to mount the amps and crossovers between the b